1. What is Channels?
Channels is a pre-built ‘landing page template' and enable you to add shows without back-end support. By utilizing Channels, you do not have to make code changes every time you want to display a new show on your website. Instead, you can manage your show library directly from the Bambuser Dashboard. It is efficient, smooth, and easy to use!
2. How do I enable Channels?
To enable channels for your Bambuser Dashboard, please reach out to your Bambuser point of contact. Your channel code can be customized and themed in your fonts and colors.
2.1 How to create and utilize the feature
Once enabled, you can head over to your dashboard and follow the steps below.
- Log in to the dashboard
- Go to Widgets and click +Create Channel (theming in place)
- Embed code on-site
- Create a show under Shows in the menu to the right
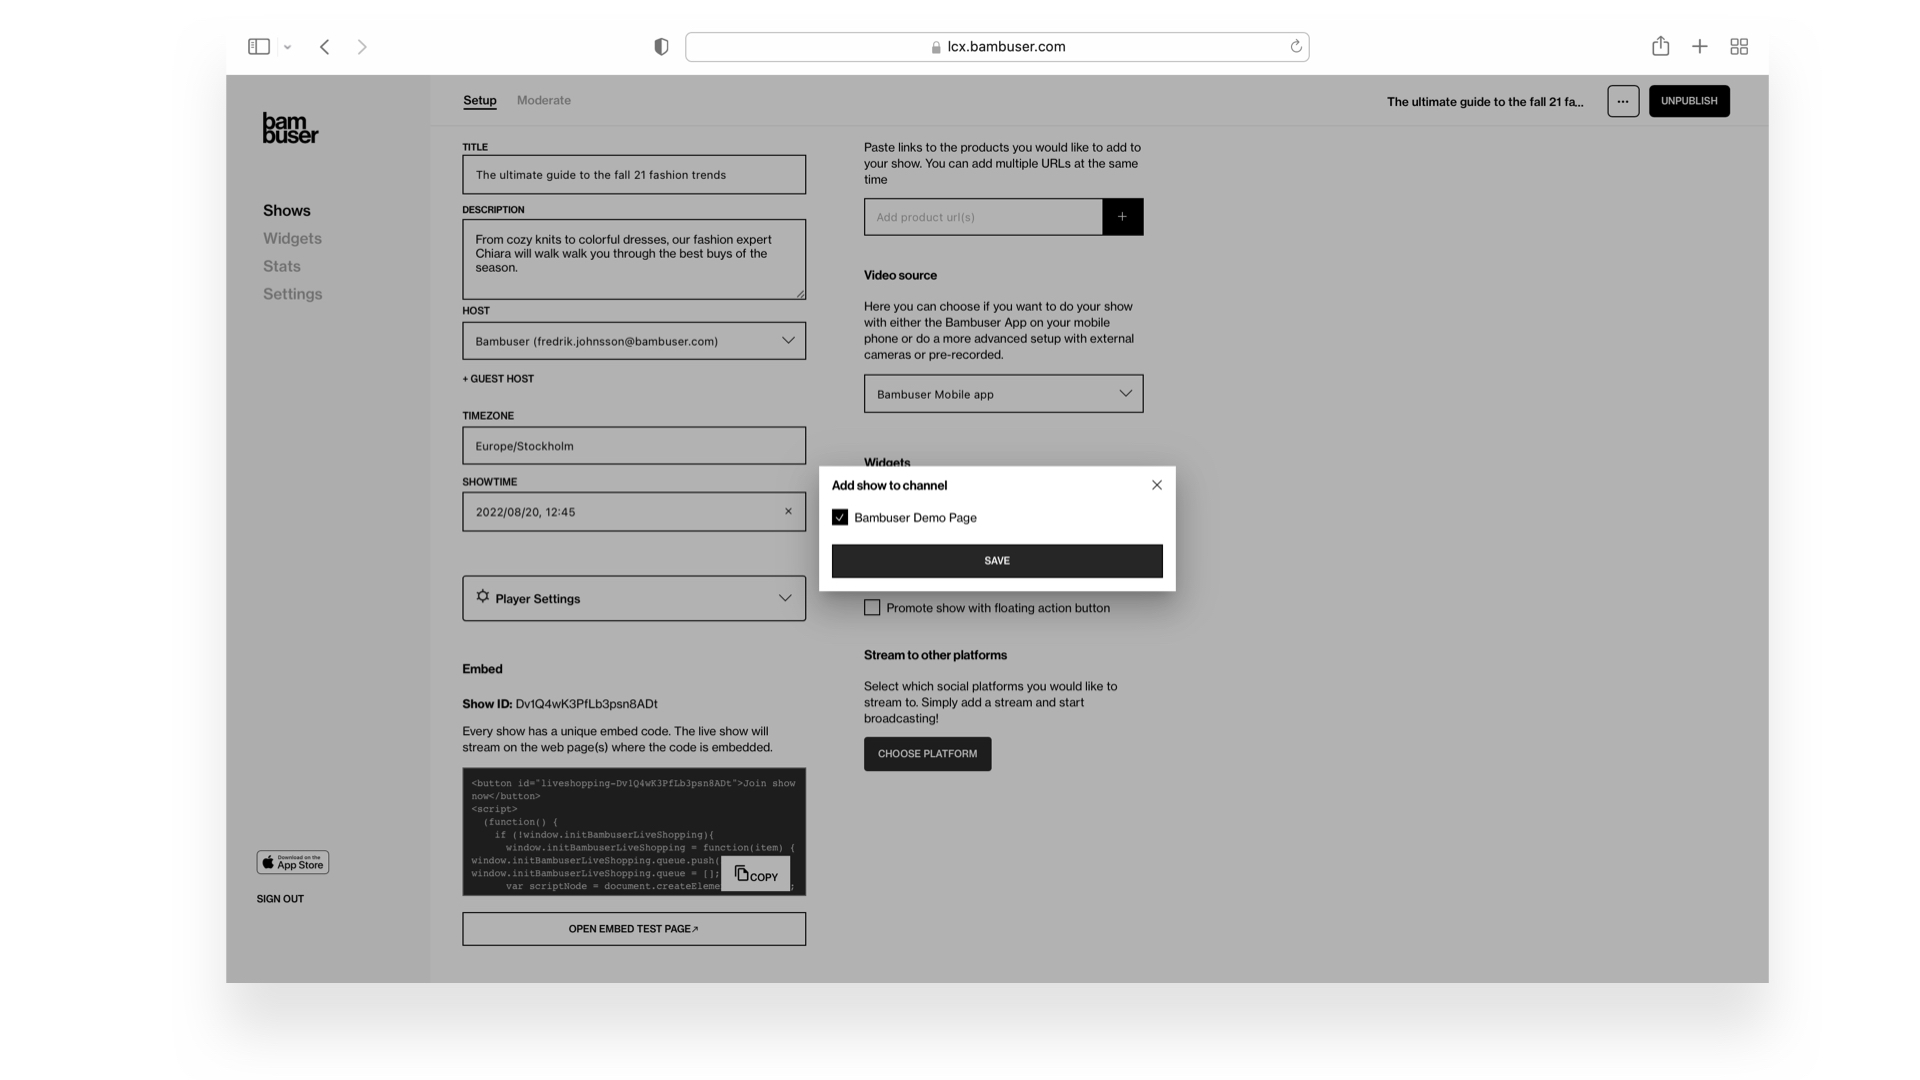
- In your show setting, click ADD TO CHANNEL, tick the created channel and save.
- The show is now live on your chosen page.
Once a channel is created, you can add shows to a specific channel by clicking ADD TO CHANNEL, ticking the correct channel name, and clicking save.
Or, you can add shows directly in the channel:
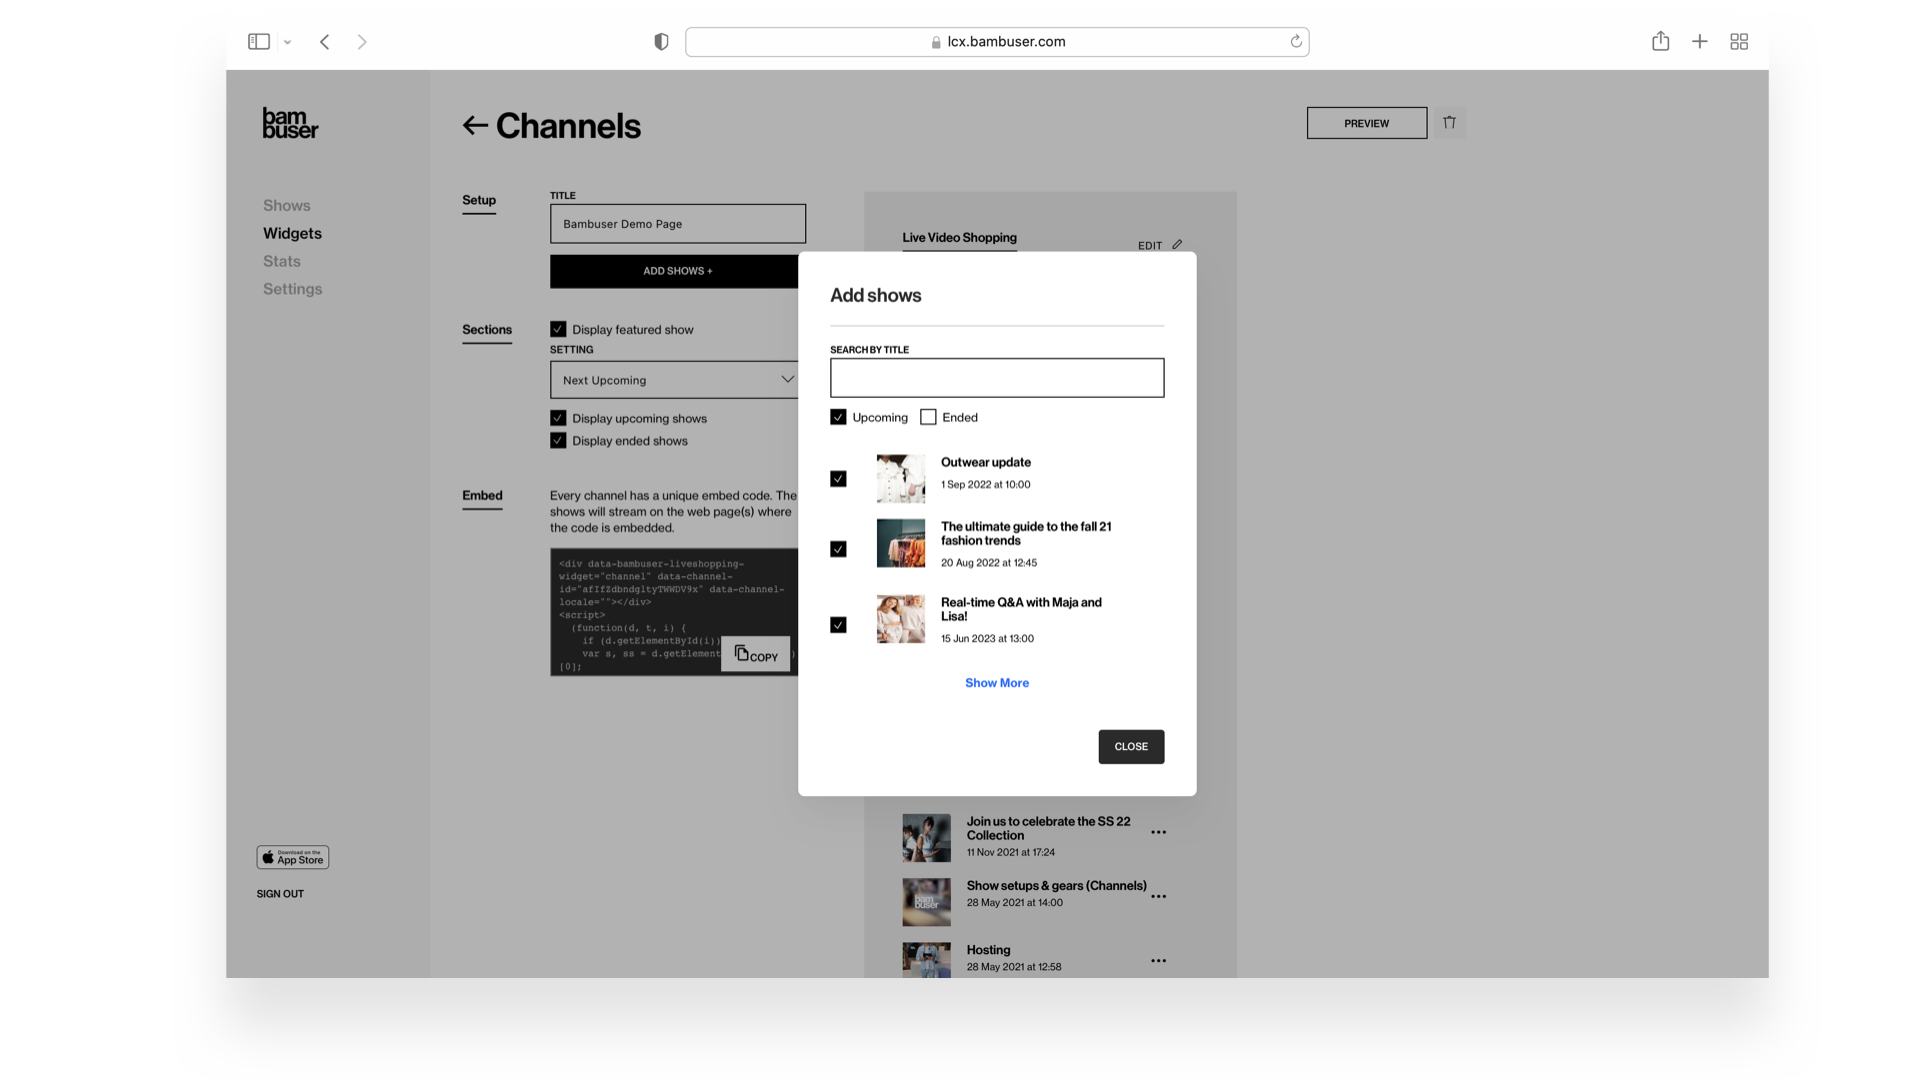
- Click on Widgets from the left menu inside the dashboard
- Click on a specific Channel you would like to modify
- Click on Add Shows button
- From the list of shows, select the shows you would like to add to your Channel
- Close the shows modal
- Each show will get placed in the corresponding section, depending on its state
2.2 Channels settings
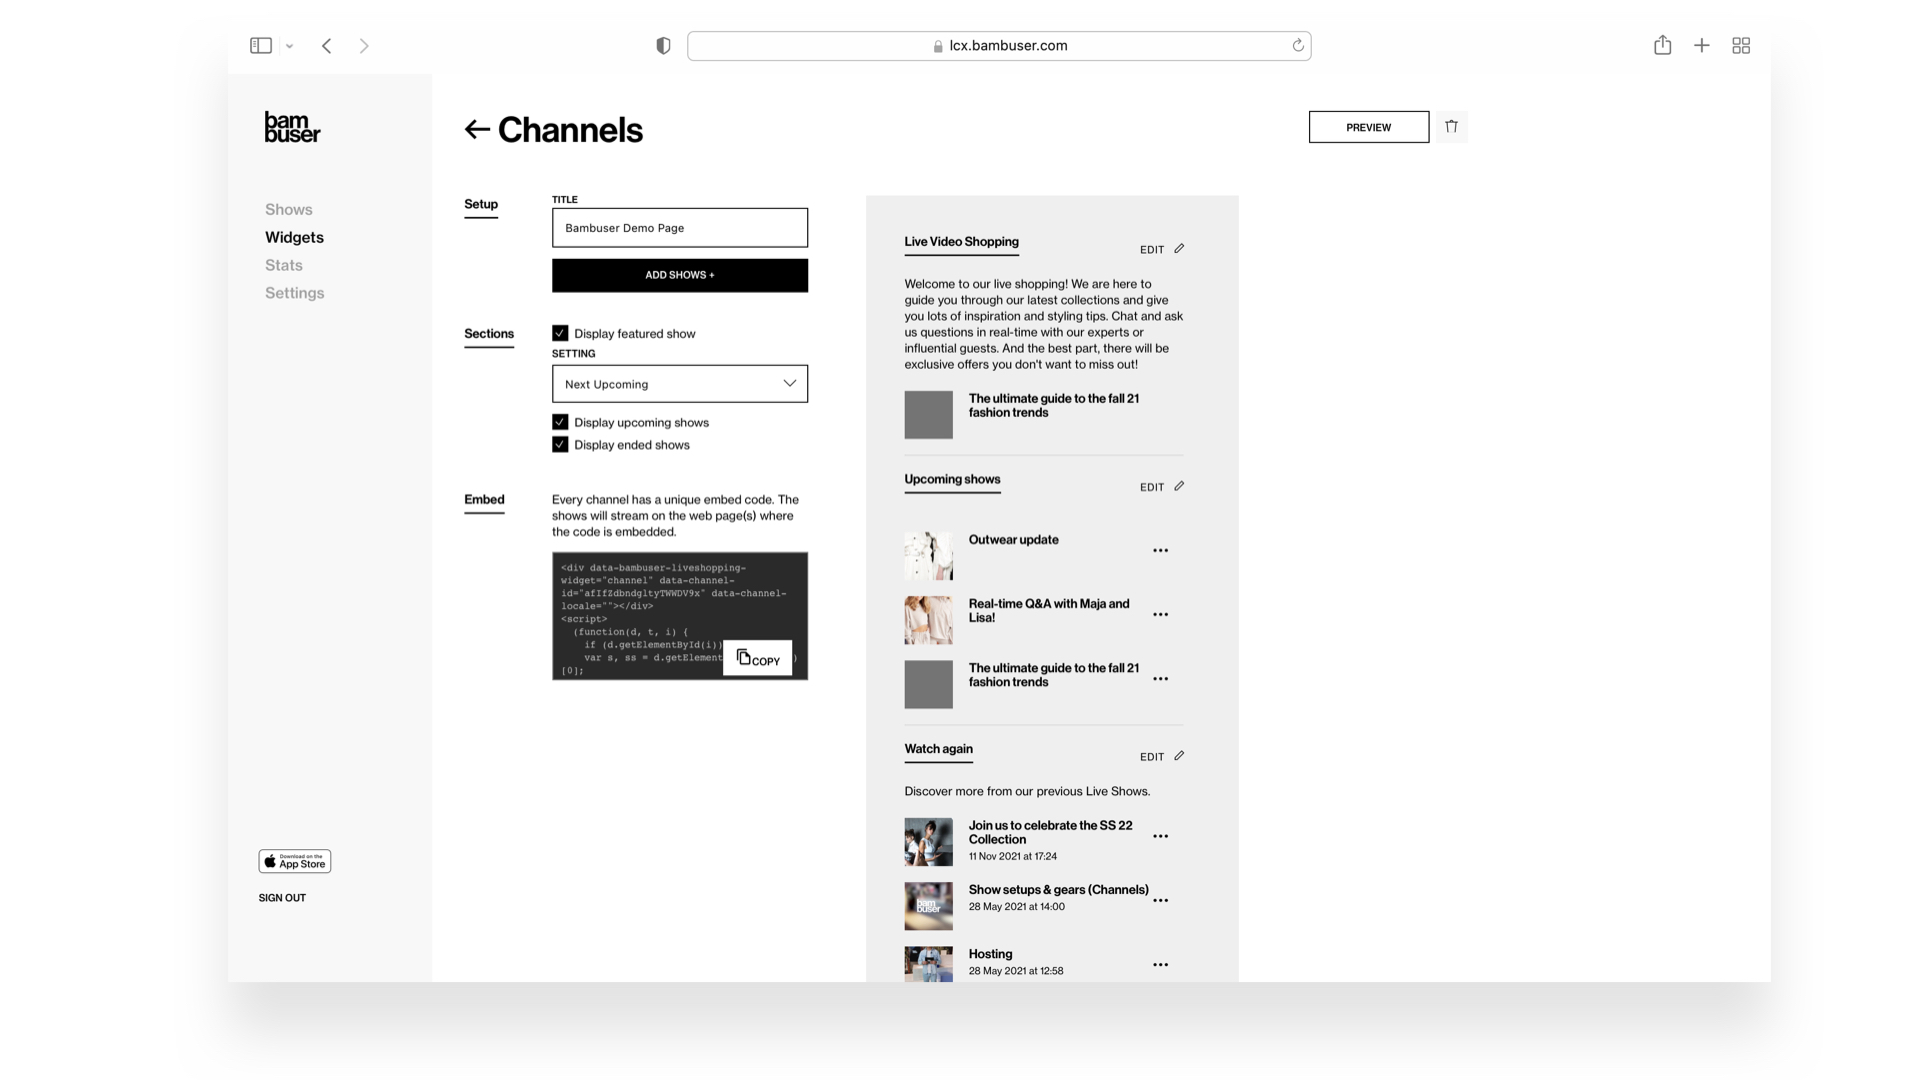
The channels have three main sections, featured show, upcoming shows, and ended shows. You can choose to showcase it or not by ticking the boxes as in the picture. A detailed explanation of each section is stated below.
Featured show
The featured section will be displayed at the very top of the Channel. It always includes ONLY ONE show. If one of the shows you have added to your Channel is live it will always be shown in this section. When there is no live show going on, you can decide whether the featured show will be:
- The latestended show - show that ended most recently
- Next upcoming show - show that is scheduled in the nearest future.
Upcoming shows
The upcoming shows section contains all future scheduled shows in that Channel, ordered by scheduled date and time. There is no limit on the number of shows you have in the upcoming section.
Ended shows
Ended shows section contains all ended shows in that Channel, ordered by ended date and time. There is no limit on the number of shows you have in the ended section.
2.3 Curtains for Channels shows
If you want some special image / curatin on your shows you will have to manually go into the show setup page of your show and add an image on the appropriate curtain in the Player settings. Different from the Player itself, the shows on the Channels do not use the default Image you might have set for your Player.
There are different cases for the different shows:
-
Featured LIVE show
This will always show a preview of the LIVE video. You can not add an image instead of the live preview. -
Upcoming shows
You need to add an image for the Before Show curtain on the show setup page. If no image is set there will be a colored curtain shown instead. -
Ended shows
Add a Pre curtain image for the show in the Ended section to show a curtain image. If no image is set there will be a screenshot from your show appearing instead
2.4 Channel Localization
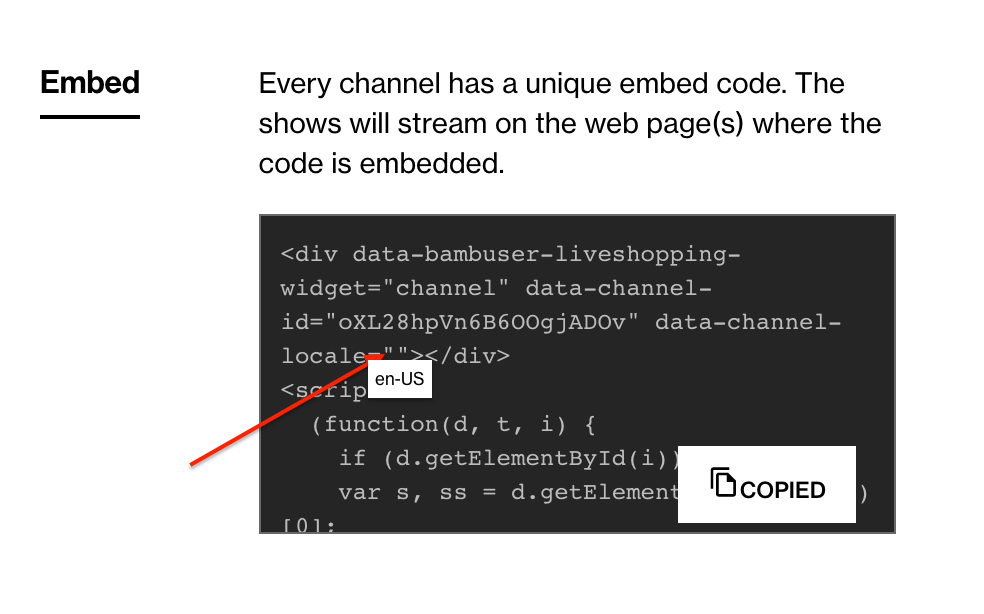
To make sure all elements get the correct translation from your locale you need to make sure to add your locale to the embedded Channel code under data-channel-locale. The locale should look like this example if you are going to use US English "en-US", Danish "da-DK", German "de-DE", French
"fr-FR" etcetera.
Add the chosen locale between " ".
3. Channel Customization
We have made a comprehensive brand book that includes everything you need to create your branded Channel. You can explore what you can customize, how it will look like, and how you submit your request.
- Branded HEX-codes
- Shape
- Branded screen background
- And more!
- Explore the Widgets Brand Book here!
Once you decide how your channel will appear from the brand book, you submit your chosen alternatives. Once your brand request has been submitted to Bambuser, it will be handled within 5-6 business days.
Submission form available below:
Download Channel Order Form (.numbers / .xls)
- Complete the form and save it
- Open your email & attach the order form
- Send the email to your Bambuser Contact person
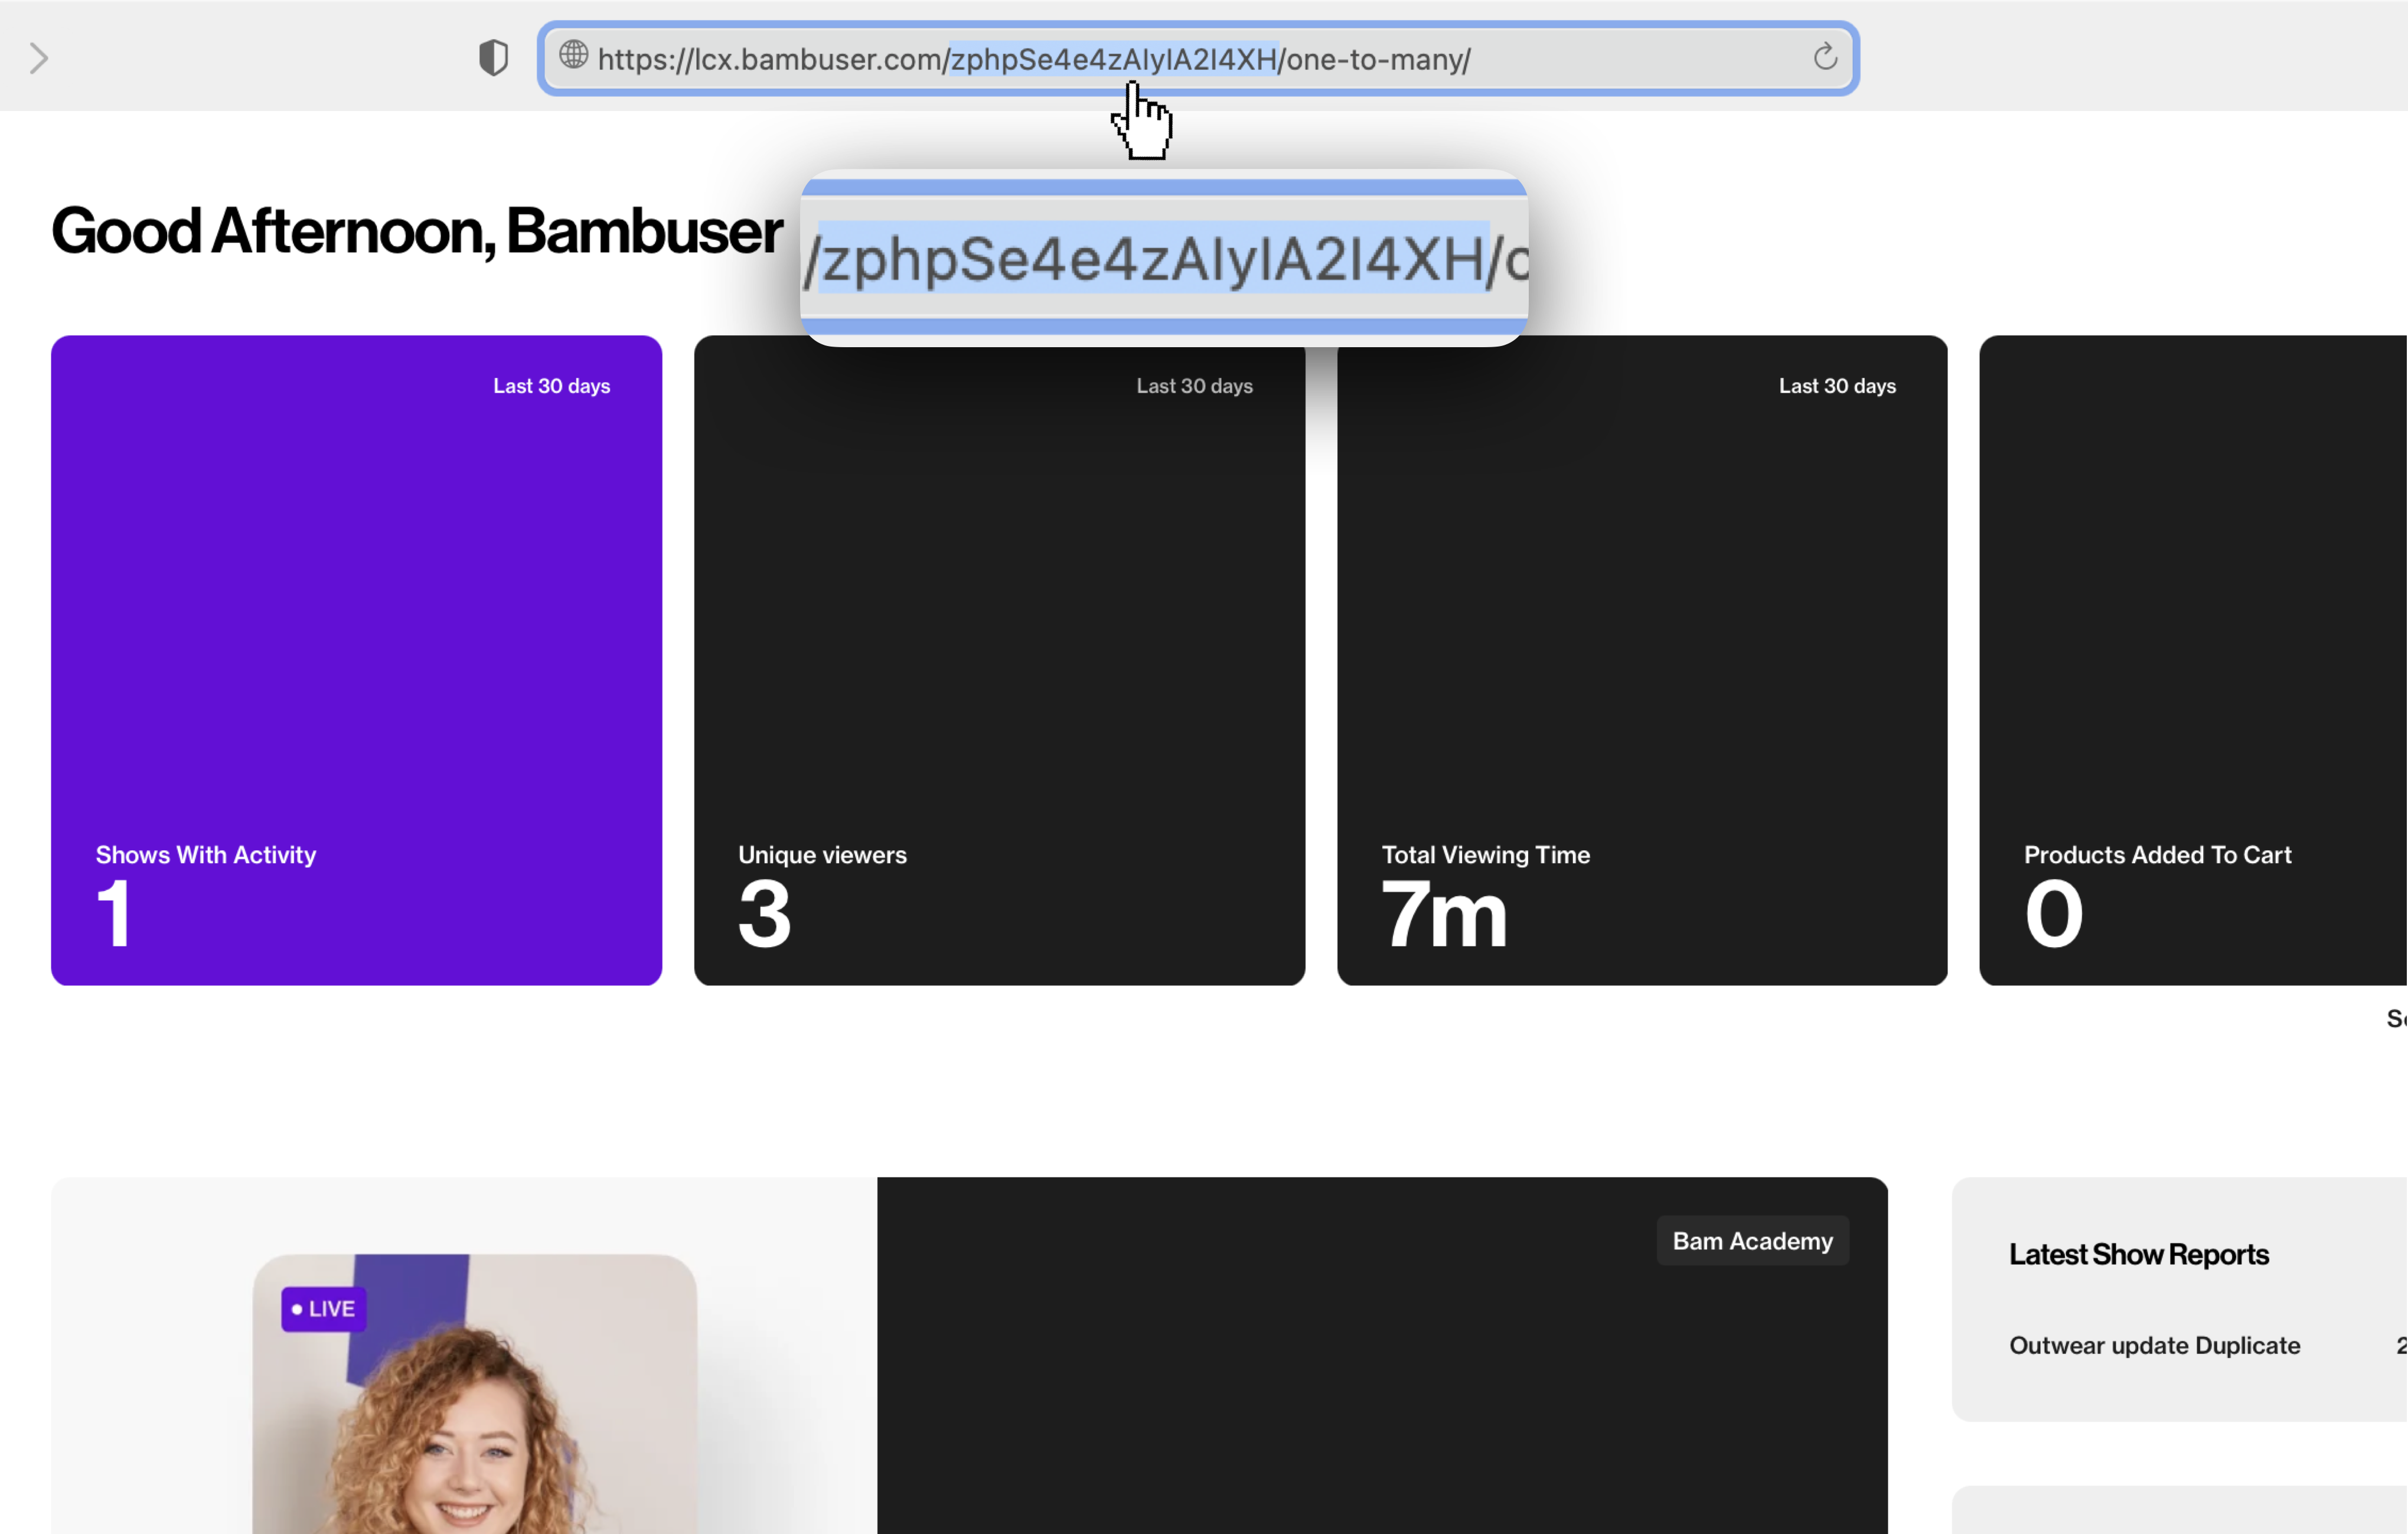
This is your org ID, it can be found in your URL once logged in to the dashboard.
4. Integration Guide
For integration documentation, please head over to Integration documentation here.
Frequently asked questions
 How do I change an image on my show?
You can go into your shows setup page in the dashboard and go to the Player customizations and add a photo for that show there.
Delete
 What is the Channels and what is the Player?
The Channels is the page where you have the collection of shows which can be divided into Featured, Upcoming, and Ended shows. When you click on a show to watch it the Player will now open up. The Channels and the Player are not the same features.
 Why isn’t all text shown in my default language on my Channel?
For the channels, you need to specify which language to use in the embeddable code snippet which you find on your Channels setup page in the dashboard. You can do so by adding your language to this line data-channel-locale="en-US", in the example we have added en-US to be used.
Delete
 Why do I not see the image I added in the Player customization?
We have had customers that have experienced an issue with caching. A simple solution is to go back to the player customizations and add the image again and make sure to click on the 'Save' button a couple of times after adding the image to make sure it is added.
 Can I change the layout for the Channels?
No, that is not possible. The Channels feature we have built is meant for quickly helping merchants to get started with collecting their shows together in one place on their page. If you want more control over the look and feel of your Channels you can build your own with the help of our REST API. See more here.