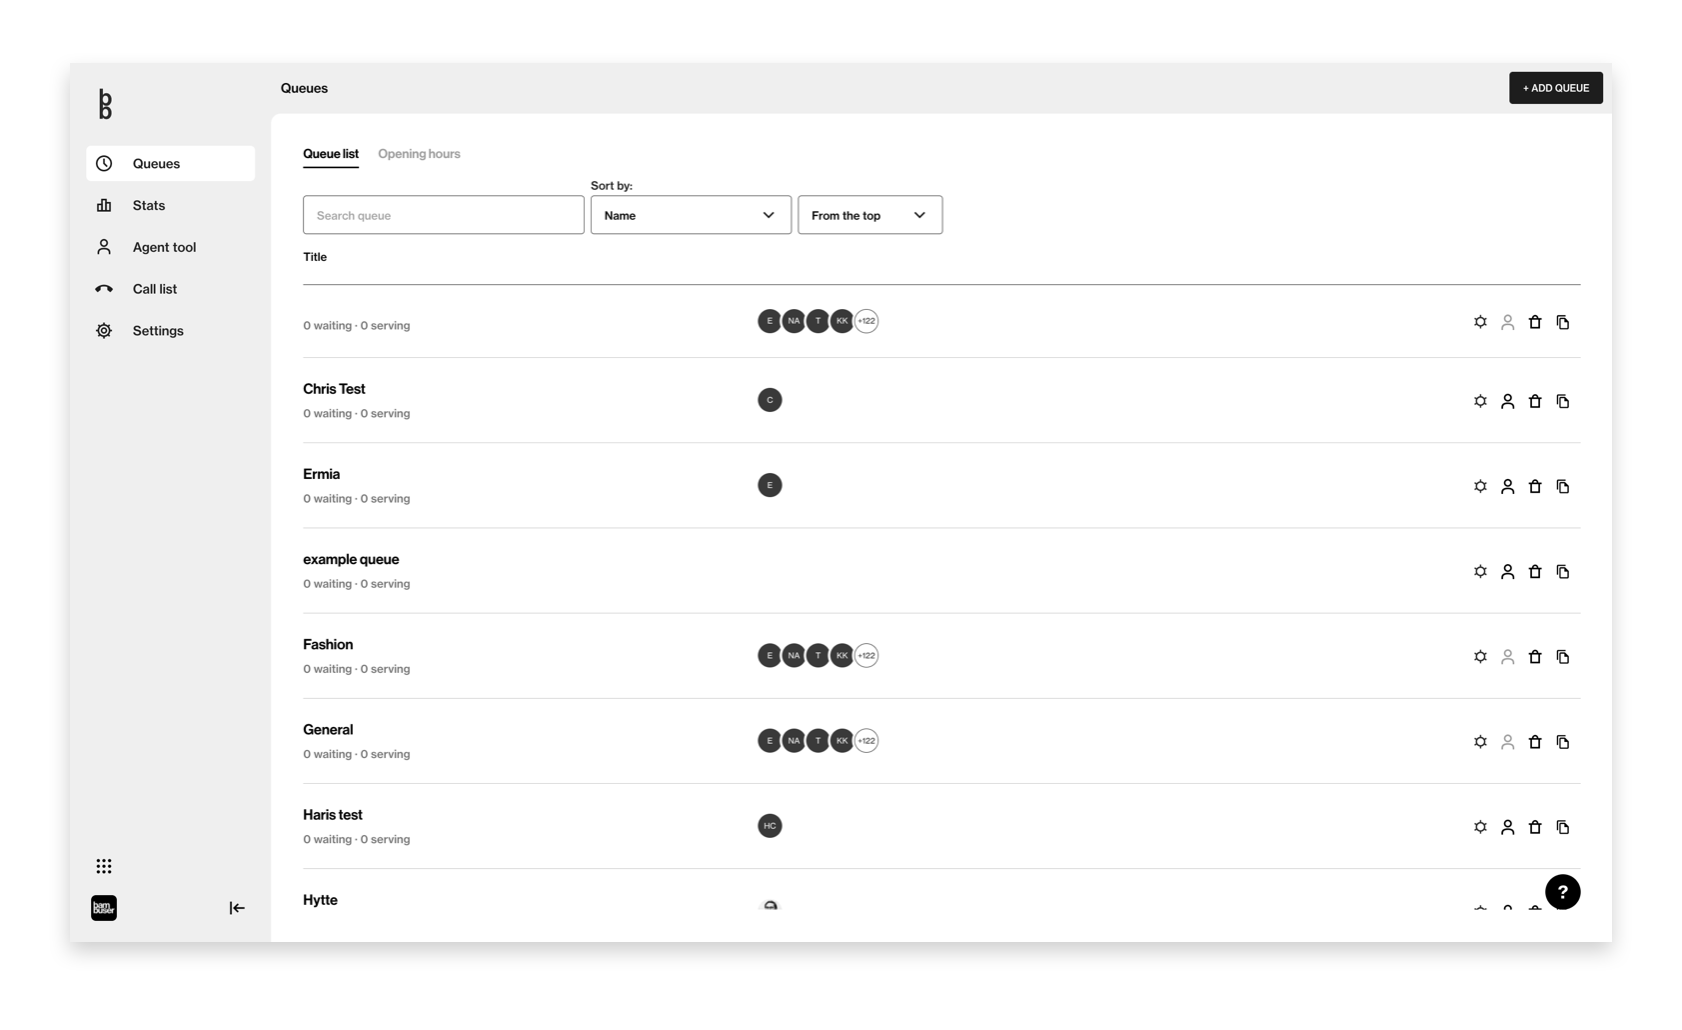
Queue list
As an admin, you can manage queues inside the dashboard. Head on over to Queues to get started. You can configure them any way you would like. Most common use cases are based on location and/or categories.
- Add queue You can add as many queues as you like
- Rename queue You can rename any created queue - if you are selecting queues through code, make sure to rename the queue in there as well
- Delete queue Deleting the queue will delete all its history and content. Operation is not recoverable
- Select default queue If no queues are specified in the code, the caller will enter the default queue
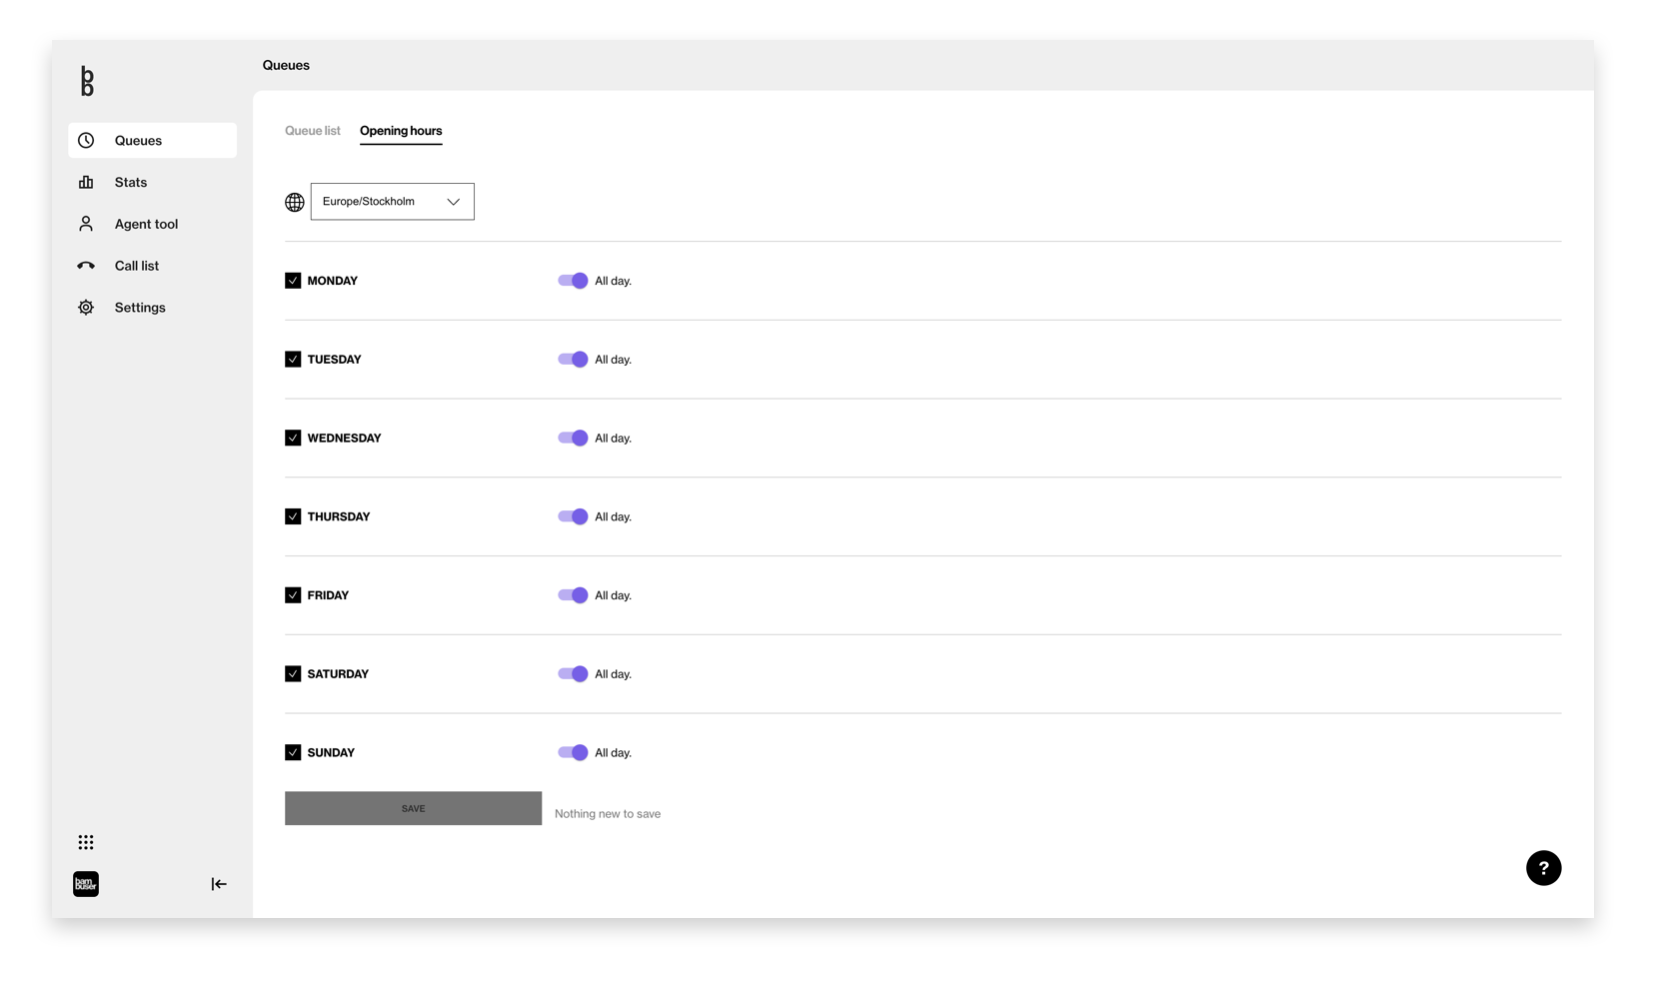
Opening hours
As an admin, you can configure the times when callers will be able to call. If they call outside of those hours, they will get a message that it serves is currently closed.
The opening hours will be based on the time zone selected on top of the page. Opening hours will apply to all queues.
Status for Served Shoppers
Each queue displays the following status information:
- Waiting: Number of shoppers currently in line for that specific queue.
- Serving: Number of agents online in that particular queue.
- Min Wait: Estimated waiting time for the last shopper in line.
For each agent, it is also visible to what platform the agent is on and their status. An agent can be in one of two states:
- Unavailable: The agent is online but currently on a call.
- Available: The agent is online and ready to take calls.
Queue Dashboard
In the agent tool, click the “new tab” icon under the Queues section to open the queue dashboard.

This dashboard displays the same information as the Queues section but in a clearer and more accessible format. It's particularly useful to keep this window open on a separate screen for enhanced visibility of the queue status.
